Bamboo Wood Flooring: A Sustainable Choice for Your Home

Bamboo wood flooring is a sustainable and stylish choice for homes, growing much faster than traditional hardwoods and requiring fewer pesticides. It’s eco-friendly, durable, cost-effective, and offers a unique aesthetic appeal. Consider bamboo flooring for an environmentally responsible and long-lasting flooring option.
Bamboo wood flooring is quickly gaining popularity as a sustainable and stylish choice for homeowners. With its unique blend of durability, eco-friendliness, and aesthetic appeal, bamboo flooring offers an excellent alternative to traditional hardwood floors. In this blog, we’ll explore what makes bamboo wood flooring sustainable, its benefits, maintenance tips, and various styles and design options available to suit any home.
What Makes Bamboo Wood Flooring Sustainable?
Bamboo is a highly renewable resource that grows much faster than traditional hardwood trees. While hardwood trees can take decades to mature, bamboo can be harvested in just three to five years. This rapid growth rate makes bamboo an excellent choice for those looking to reduce their environmental impact.
Additionally, bamboo is known for its ability to regenerate after harvesting, meaning that the same plant can be used multiple times without the need for replanting. This reduces soil erosion and helps maintain the ecosystem. Bamboo requires fewer pesticides and fertilizers compared to conventional hardwood trees, making its cultivation more environmentally friendly.
Benefits of Bamboo Wood Flooring
Eco-Friendly
As mentioned, bamboo’s fast growth and minimal need for replanting make it an environmentally friendly option. Choosing bamboo flooring supports sustainable practices and helps conserve traditional hardwood forests.
Durability
Bamboo is known for its strength and durability. Strand-woven bamboo, in particular, is one of the hardest natural flooring materials available, making it ideal for high-traffic areas. Its resistance to wear and tear means that bamboo flooring can last for many years with proper care.
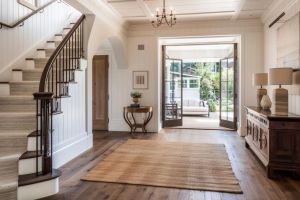
Aesthetic Appeal
Bamboo flooring offers a unique and contemporary look that can enhance any home’s interior. Its natural grain and varied color options can complement a wide range of décor styles, from modern to rustic.
Cost-Effective
Bamboo flooring is often more affordable than traditional hardwood floors, making it a cost-effective choice for homeowners who want the beauty of wood without the high price tag.
Maintenance Tips for Bamboo Wood Flooring
Maintaining bamboo wood flooring is relatively easy, but there are a few key tips to keep it looking its best:
Regular Cleaning
Sweep or vacuum your bamboo floors regularly to remove dirt and debris that can scratch the surface. Use a microfiber mop and a pH-neutral cleaner designed for wood floors to keep them clean without damaging the finish.
Avoid Excessive Moisture
Bamboo flooring can be sensitive to excessive moisture, so it’s important to wipe up spills immediately and avoid using wet mops. Place rugs in high-moisture areas like kitchens and bathrooms to protect the flooring.
Protect from Scratches
Use felt pads under furniture legs to prevent scratches and place mats at entryways to reduce the amount of dirt and grit tracked onto the floor.
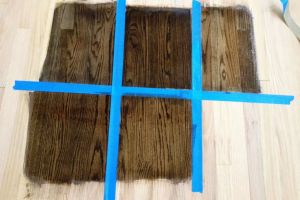
Refinish When Needed
Over time, bamboo flooring may show signs of wear. Refinishing the surface can restore its original beauty. Consult with a professional to determine the best refinishing method for your specific type of bamboo flooring.
Bamboo Flooring Styles and Design Options
Bamboo flooring comes in a variety of styles and finishes to suit different tastes and design preferences:
Horizontal Bamboo
This style showcases the natural grain of bamboo with a wider, more pronounced pattern. It’s ideal for those who want to highlight the natural beauty of bamboo in their home.
Vertical Bamboo
Vertical bamboo flooring has a more uniform and linear appearance, providing a sleek and modern look that works well in contemporary settings.
Strand-Woven Bamboo
Strand-woven bamboo is created by compressing bamboo fibers under high pressure, resulting in a highly durable and dense flooring material. This style offers a unique, textured appearance and is available in various colors.
Stained and Carbonized Bamboo
For homeowners seeking specific color tones, stained and carbonized bamboo options are available. Carbonization involves heating the bamboo to change its color, resulting in a rich, darker hue. Stained bamboo can be customized to match any décor.
Final Thoughts
Bamboo wood flooring is an excellent sustainable choice for homeowners looking to combine style, durability, and eco-friendliness. Its fast growth and renewability make it an environmentally responsible option, while its strength and beauty ensure it will enhance any home for years to come. With various styles and finishes available, bamboo flooring can complement any design aesthetic. By following proper maintenance tips, you can keep your bamboo floors looking beautiful and performing well for decades. Consider bamboo wood flooring for your next home improvement project and enjoy the many benefits it has to offer.
FAQ’s
What are the main advantages of choosing bamboo wood flooring over traditional hardwood?
Choosing bamboo wood flooring over traditional hardwood offers several advantages. Bamboo is highly sustainable and environmentally friendly due to its rapid growth rate, making it a greener choice. It’s also known for its durability and resistance to moisture and insects, which can be beneficial in various climates. Additionally, bamboo flooring tends to be more cost-effective compared to traditional hardwood, providing a beautiful, natural look without the higher price tag. Custom Hardwood Flooring LA offers expert installation services to ensure your bamboo flooring is perfectly fitted and long-lasting.
How durable is bamboo wood flooring compared to other types of flooring?
Bamboo wood flooring is incredibly durable and often outperforms many traditional hardwoods in terms of strength and longevity. It is less prone to warping and swelling due to changes in humidity and temperature. Strand-woven bamboo flooring, in particular, is known for its exceptional hardness and resistance to dents and scratches, making it a great choice for homes with pets or heavy foot traffic. At Custom Hardwood Flooring LA, we provide high-quality bamboo flooring that stands up to daily wear and tear, ensuring your floors remain beautiful for years.
Is bamboo wood flooring suitable for high-traffic areas in the home?
Yes, bamboo wood flooring is highly suitable for high-traffic areas in the home. Its natural hardness and durability make it resistant to scratches and dents, even in the busiest parts of your house. Strand-woven bamboo, in particular, is one of the toughest flooring options available. It can handle the daily wear and tear of active households, including areas like living rooms, hallways, and kitchens. Custom Hardwood Flooring LA specializes in installing bamboo flooring in high-traffic areas, ensuring your floors remain resilient and attractive over time.


More Blogs


Categories
Leave a Reply